Showing posts with label Jewish Cuisine. Show all posts

Saturday, August 31, 2013

Spiced Apple and Honey Ice Cream


This year we are hosting our first Rosh Hashanah dinner.  Instead of the traditional brisket or roastchicken, we are serving chicken fesenjan, a Persian dish that contains pomegranates, a fruit often associated with the Jewish New Year.

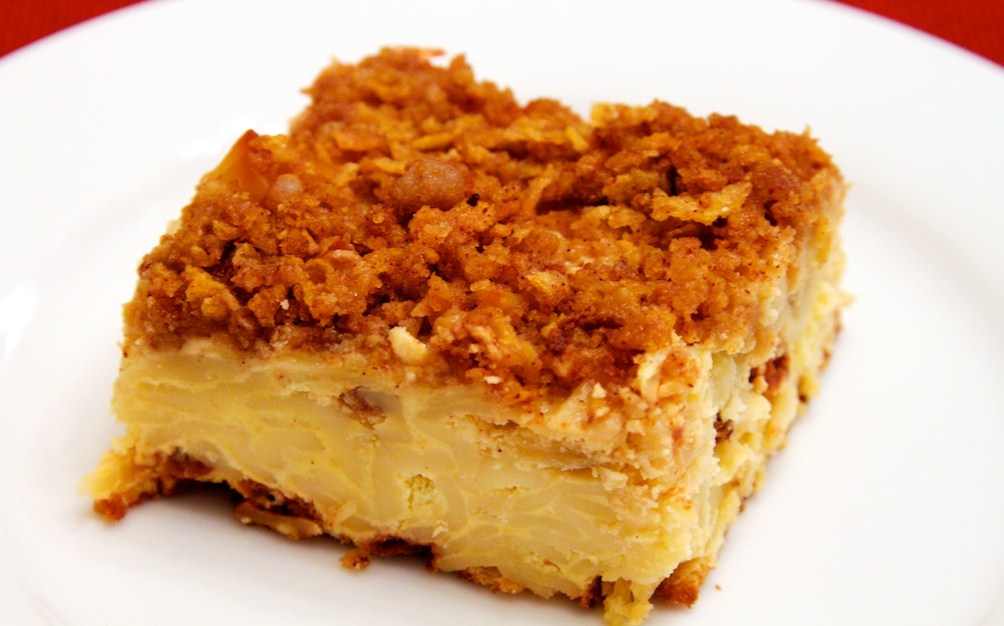
For dessert I made this ice cream which includes apples and honey, which symbolize a sweet new year.  The Ashkenazi community first linked these ingredients with Rosh Hashanah in late medieval times; now the association is widespread throughout the Jewish community.

The apple has particular significance for several reasons: Rosh Hashanah is believed to be the day when God created Adam and Eve in the Garden of Eden and the garden is believed to have had the scent of an apple orchard; ancient Jews believed apples had healing properties; the apple is also considered by some to represent the feminine aspect of God and eating apples represents our hope of being well-judged by him.

This ice cream can be served alone or as an accompaniment to honey or apple cake.  Other dishes that can be served at Rosh Hashanah include pomegranate couscous, noodle kugel, and honey cake.  Each of them contain some of the ingredients associated with this holiday.


Serves 10

Ingredients

Spiced apples
3 large apples, cored, peeled, sliced, and cut into 1/2 inch pieces (about 2 cups)
1/2 cup honey
1 teaspoon vanilla
1 teaspoon cinnamon
1 teaspoon allspice
1/2 teaspoon lemon zest
pinch of salt

Ice cream
3 cups heavy cream
9 large egg yolks
3 cups whole milk
1 1/2 cups granulated sugar
pinch of salt
2 teaspoons vanilla extract
1 tablespoon vodka or other neutral alcohol (optional, to lower freezing temperature)
1/2 cup apple sauce (ideally one with a strong, spicy flavor)

Directions
1.     In a medium saucepan, combine the spiced apples ingredients.  Cook over medium heat, stirring often, until the apples are tender and all the liquid has evaporated.  This should take about 10 minutes.  Let the apples cool and then place them in the fridge to chill.
2.     Pour 2 cups of heavy cream into a large bowl and set aside.  In a separate bowl, whisk the egg yolks until smooth.
3.     Combine the milk, sugar, salt, and remaining heavy cream in a medium saucepan over medium heat.  Once the mixture is warm and just begins to bubble, slowly pour about half of it into the bowl with the egg yolks, whisking constantly.  Return the mixture to the saucepan over medium high heat.
4.     Cook the mixture, stirring constantly and scraping the bottom, until it thickens and coats a spatula or spoon (about 170-175° F).  Pour the mixture through a strainer into the large bowl with cream (this will remove any egg that has cooked).
5.     Mix in the vanilla and vodka.  Thoroughly chill the mixture in the refrigerator for 8 hours or overnight.  Lay plastic wrap on the mixture so that a skin does not form.
6.     Pour the mixture into the bowl of an ice cream maker, and prepare according to the manufacturer’s instructions.  About 10 minutes before the end of the cycle, add apple sauce to the ice cream.
7.     In the final minute, add the cooled spiced apple mixture until well incorporated.

8.     Remove and store in an airtight container for up to three months.

Saturday, January 15, 2011

Noodle Kugel


Noodle kugel is an Ashkenazi Jewish casserole usually served as a side dish or a dessert. It is often prepared for the Sabbath and holidays.

Kugels were originally savory cakes made with flour. Eight hundred years ago, the flour was replaced with noodles or farfel; dairy products were added to create a custard-like consistency. More recent versions may contain raisins and cinnamon.

Kugel comes from the German word ball, since the dish was originally baked in a round pan. Contemporary kugels are most commonly baked in square or rectangular dishes.


Serves 12-16


Ingredients

12 ounces egg noodles
6 eggs
16 ounces small curd cottage cheese
4 ounces cream cheese
8 ounces sour cream
3/4 cup unsalted butter (1 1/2 sticks), melted
3/4 cup granulated sugar
1 tsp vanilla extract
1 or 2 Granny Smith apples, peeled and diced
1/2 cup golden raisins (optional)
1 cup corn flake crumbs
1/2 cup brown sugar
1 teaspoon cinnamon

Directions
1. Cook noodles according to instructions on packet. Drain and rinse with cold water.
2. In a large bowl beat eggs and add cottage cheese, cream cheese, sour cream, 1/2 cup butter, granulated sugar and vanilla. Beat well.
3. Gently fold in noodles, apples and raisins.
4. Pour into a greased 9 x 13 Pyrex dish.
5. In a small bowl mix corn flake crumbs, brown sugar and cinnamon. Add 1/4 cup melted butter and mix well. Sprinkle mixture on top of kugel.
6. Bake at 350F in a preheated oven for 75-90 minutes or until the topping is a rich golden brown.
7. Cool at room temp for 15 minutes. Serve warm.

Tuesday, November 23, 2010

Laura's Latkes


This year marks my fifth Hanukkah celebration with my fiancé’s family. In anticipation, I’m sharing his mother’s latke recipe which is the culinary highlight of the holiday. Latkes are potato pancakes common to the cuisines of Eastern, Central and Northern Europe. Similar creations can be found in Persian, Indian and Korean cuisine. Latkes are traditionally eaten by Ashkenazi Jews during Hanukkah.

Many dishes associated with Hanukkah are fried in oil since the miracle of the holiday involved oil. According to tradition, the Maccabean rededication of the Second Temple in Jerusalem was celebrated with an eight day ceremony. The observance required that a menorah be continuously lit, but there was only enough oil for one night because the Temple had been desecrated. Miraculously, the oil lasted for eight days.

Other traditional dishes are doughnuts (especially sufganiyot), fritters, and cheese. For another Hanukkah recipe, check out my shortbread cookies.

Ingredients
3 Yukon Gold potatoes, shredded or grated (not mashed)
3 red potatoes, shredded or grated (not mashed)
1 large onion, finely chopped
2 eggs
1/2 cup matzo meal
1 teaspoon salt
peanut oil, for frying

Directions
1. Take 1 cup of the shredded Yukon potatoes and further shred in a food processor. This will aid in binding the latkes. Add it back to the potato mixture.
2. In a big bowl, mix all the ingredients (except oil) with your hands. Let the mixture sit for 10 minutes.
3. Heat a skillet with oil 1/2-inch deep over medium high. The oil should not be smoking. Hot oil sears the latke and prevents it from absorbing too much additional oil.
4. Drop two tablespoons of potato mixture into the hot oil. Release the mixture so that it forms a latke about 3 inches in diameter. Latkes should be fried for 3-5 minutes on each side until dark golden brown. Flip over and fry the other side as well. Fry 3-5 latkes at a time depending on the size of your skillet.
5. Drain on paper towels to remove some of the oil.
6. Repeat with remaining mixture. Replenish oil as needed.
7. Serve warm with apple sauce and sour cream.

Sunday, February 21, 2010

Valentine Borscht


Borscht is a peasant soup popular in Central and Eastern Europe. The word comes from the Slavic word borshchevik which means hogweed, a vegetable once important to the Slavs. Today the defining ingredient in borscht is beet root although there are some versions that do not contain beets. For more information about beets read my post from last year about a summer beet salad.
In the Ukraine, where borscht is likely to have originated, it is the national soup and was sometimes eaten multiple times a day as a main meal. It is also served as the first course of a traditional Polish Christmas meal. In other places, it is generally consumed before the main meal.
There are two key types of borscht – hot and cold. The hot version is often chunky, made with potatoes, vegetables and sometimes beef. The cold version is sometimes strained before serving and thus has a thinner consistency (similar to gazpacho). Variations abound and recipes have been known to include dried mushrooms, parsley, dill, lovage, green onions, basil, beans, pickled apples, plums, cherries, eggplant, olives, prunes, ham, mint, ginger, leeks, tomatoes, bell peppers, tarragon, paprika, oregano and sausage.
Many versions require the addition of an acid to sour the – this can be achieved through the addition of lemon, vinegar or citric acid. Some recipes call for natural fermentation which requires the soup to be made several days in advance. Borscht is often served with sour cream, yogurt, cream or a local dairy equivalent.
In North American borscht is closely associated with Ashkenazi Jewish traditions. The term ‘Borscht Belt’ refers to the swath of summer resorts in upstate New York that were popular with New York City Jews between the 1920s and 1960s.
As a humble and quotidian dish, I’ve never heard of the soup in conjunction with Valentine’s Day. However, it seemed perfect as a bright red starter on a cold winter day. It freezes well but will stain plastic containers so we opted to use one gallon freezer bags.

Serves 10-14

4 tablespoons olive oil
2 large onions, chopped
1 1/2 pound russet potatoes (about 2), peeled, chopped into small cubes
1/2 lb carrots, sliced
small cabbage or half a medium cabbage, thinly chopped
6-8 cups vegetable (or meat-based) broth
15 ounces diced tomatoes
4 large beets, peeled and chopped into small cubes
5 bay leaves
4 tablespoons red wine vinegar (balsamic or other)
1 bunch of dill, finely chopped
salt and pepper
sour cream, for garnish (optional)

1. Heat olive oil in a large pot over medium-high heat. Add onions, potatoes, carrots and cabbage. Sauté for 10 minutes.
2. Add broth, tomatoes, beets and bay leaves. Bring soup to a boil, then reduce heat and simmer for 15 minutes.
3. Add red wine vinegar and 1/2 dill. Continue cooking for another 15 minutes or until the vegetables are tender.
4. Flavor with salt and pepper to taste. Remove bay leaves.
5. Serve with a dollop of sour cream and remaining dill.


Sunday, September 20, 2009

Pomegranate Couscous


Couscous consists of small pellets of wheat used as a staple similar to rice or pasta. There are two types of couscous, both of which are used in the recipe below. What I call ‘regular’ couscous is made by creating pellets from moistened semolina coated with fine wheat flour. These are about 1mm in diameter before cooking. The other type, commonly called pearl or Israeli couscous, is about 2-3mm in diameter and is made from hard wheat instead of semolina.

Traditional couscous is hand-made and shaped in a very labor-intensive process. It is often steamed several times until cooked. In North America and Europe, one can purchase pre-steamed couscous which is easily prepared by adding boiling water. This quick-cooking version is popular because it can be prepared in five minutes with minimal fuss.

Early references to couscous date to 13th century Syria and Moorish Spain. By the 17th century it was known in Sicily, Tuscany, Rome and Brittany. Today it is a staple in the Maghreb, and is common but less popular in the Middle East, Southern Europe and among the Sephardic Jewish diaspora. While often topped with meat, fish or vegetables, it is often prepared as a dessert with some combination of nuts, sugar/honey, raisins, coconut, cinnamon, and milk/cream.

I made this couscous as a side dish for Rosh Hashanah, the Jewish New Year. It contains pomegranates which are one of the foods associated with this holiday. It was served with my Aunt Barbara’s Mediterranean chicken. To read about the significance of Rosh Hashanah, see last year’s post for honey cake.


Serves 14-16

Ingredients
4 cups chicken or vegetable stock
6 tablespoons butter
2 teaspoons salt
2 cups regular couscous
1 1/2 cups pine nuts
1 1/2 cups shallots, finely chopped
2 1/2 cups pearl (also called Israeli) couscous
4 dried bay leaves
1/4 teaspoon cinnamon
zest of 2 lemons
1 bunch parsley, finely chopped
3/4 cup golden raisins
black pepper, to taste
1 pomegranate, seeds removed

Directions1. In a large pot bring 2 cups stock, 2 tablespoons butter and 1 teaspoon salt to a boil.
2. Remove from heat, add regular couscous and cover for 5 minutes.
3. Fluff with a fork and set aside.
4. Add 2 more tablespoons butter to the pot, and over medium heat sauté pine nuts until golden brown and fragrant. Set aside.
5. Add 2 more tablespoons butter to the pot, and over medium heat sauté shallots until translucent.
6. Add pearl couscous, bay leaves and cinnamon. Stir for 5-7 minutes until the couscous browns slightly.
7. Add remaining stock and 1 teaspoon salt. Bring to a boil, then reduce the heat to low. Cover and simmer for 8-10 minutes until all the liquid has been absorbed. Make sure that the couscous is tender.
8. Remove from heat and discard the bay leaves.
9. In a large mixing bowl, combine regular couscous and pearl couscous. Add pine nuts, lemon zest, parsley, raisins, pepper and half pomegranate seeds. Mix well.
10. Serve topped with remaining pomegranate seeds.

Thursday, April 23, 2009

Sweet Matzoh Brei

It’s been a couple of weeks since Passover and many Jewish people (and their admirers) realize that they have boxes of unused matzoh. I’ve learned that these make great vehicles for peanut butter, honey, chocolate and jelly. However if you want a substantive meal, your best bet is matzoh brei (literally fried matzoh). The dish is essentially matzoh French toast and comes out of the same tradition – a way to salvage unused or stale bread.

Matzoh brei can be sweet or savory and prepared formed like a frittata or loose like scrambled eggs. It can be topped with salsa, apple sauce, jelly, sugar or preserves. Some people incorporate cheese, meat or vegetables. Matzoh brei is generally prepared during Passover when observant Jews do not eat leavened bread. However it makes a delicious and quick breakfast or brunch at any time of the year.

Ingredients
3 matzohs
hot water
3 eggs
1/2 cup milk
1 teaspoon vanilla extract
1/2 tablespoon unsalted butter
1/2 teaspoon cinnamon (optional)
maple syrup, for serving

Serves 2-3

Directions
1. Break matzoh into pieces, approximately 1-2 inch squares.
2. Place in a strainer and pour 2 cups of boiling water over the matzohs. Let sit for 2 minutes.

3. In a medium bowl beat eggs, milk and vanilla.
4. Place skillet over medium heat and melt butter.
5. Dip all the matzoh into egg mixture and transfer to heated skillet.

6. Cook on one side and then flip over to cook on the other side. The matzoh brei should be as cooked as scrambled eggs before serving.
7. Sprinkle liberally with cinnamon and serve with maple syrup.

Saturday, October 4, 2008

Honey Cake


Rosh Hashanah, the Jewish New Year, took place on Monday and Tuesday of this week. It commemorates the creation of man as described in the Old Testament, and marks the beginning of ten days of repentance that concludes with Yom Kippur. These days are known as the High Holidays or Yamim Noraim (translated as the Days of Awe). Most Jewish communities observe Rosh Hashanah on two consecutive days due to the difficulty of determining the date of the new moon, and some say this is supposed to constitute one long day. The traditional Hebrew greeting is leshana tova, meaning “have a good new year”.

Rosh Hashanah service includes a number of special prayers and religious poems. In addition, the shofar, a ram’s horn, is blown during the holiday to awake people from their “slumber” and alert them to the coming judgement. During the afternoon of the first day, prayers are recited near naturally flowing water to cast off one's sins. This practice is called tashlikh and may be accompanied by throwing bread or pebbles into the water as a physical manifestation of those sins.

The Rosh Hashanah meal include apples and honey to symbolize a sweet New Year. This is a late medieval Ashkenazi tradition though it is now almost universally accepted. A round challah bread (as opposed to the traditional braided style) is served to symbolize the cycle of the New Year. Other traditional foods include dates, spinach, leeks, gourds, black-eyed beans, and pomegranates – all of which are mentioned in the Talmud. In addition, meat from the head of an animal (such as tongue or cheek) may be served to symbolize the “head” of the New Year.

When I lived in Boston, my friends Karen and Matt would have me over for dinner on Rosh Hashanah. This Monday, my boyfriend and I went to a service at a reconstructionist congregation, followed the next day with dinner at his aunt and uncle's house. For my contribution to the meal, I made this incredibly moist honey cake, adapted from a recipe by Marcy Goldman. It was a hit! The cake only dirties one bowl and it’s dairy free for those of you who have dietary restrictions.

Leshana tova!

Ingredients
2 1/2 cups plus 2 tablespoons all-purpose flour
2 1/4 teaspoons baking powder
3/4 teaspoon baking soda
3 teaspoons ground cinnamon
1/2 teaspoon ground cloves
1/2 teaspoon allspice
1/2 teaspoon salt
1 cup granulated sugar
1/2 cup brown sugar
3 eggs , lightly beaten
1 teaspoon vanilla extract
3/4 cup vegetable oil
3/4 cup honey
3/4 cup warm coffee or strong black tea
1/2 cup orange juice

Directions
1. Preheat oven to 350 F.
2. Grease and flour a 10-inch Bundt pan.
3. In a large bowl, mix flour, baking powder, baking soda, cinnamon, cloves, allspice and salt. Mix well.
4. Make a well in the center and add remaining ingredients. Use an electric mixer to completely blend the batter, making sure no ingredients are stuck to the bottom or sides.
5. Pour batter into baking pan, and place pan on a cookie sheet. Bake for 60-75 minutes or until cake tester comes out clean. This is a very moist batter so it may take even longer to fully bake.
6. Let cool for 20 minutes before removing cake. Allow to cool to room temperature before serving.

Saturday, April 19, 2008

Chocolate Glazed Doughnuts


I have always loved doughnuts. How can you beat sugar or icing topped deep-fried dough? I love all kinds of doughnuts – honey glazed, crullers, Long Johns, double chocolate, apple fritters, jelly-filled, doughnut holes – I could go on. Once or twice a year in elementary school we had “Texas Donut Day” where we could buy huge (hence Texas) doughnuts during recess. Thinking back on it, I’m not sure why the school was pedalling super-sized snacks. Was it an honorable fundraising scheme or did one of the teachers have shares in a doughnut company?

In the days before Tim Hortons, we went to the Country Style Donut shop on Saturday afternoons. I dreamed of being the proprietor – eating and selling doughnuts in equal quantities. As practice for my business venture, I tried making doughnuts one day after school. Luckily my mom came home before I started frying!

Since that time I’ve come to look at doughnuts as oil-soaked artery cloggers. I rarely purchase them, and when I do, I feel rather guilty. However, my deep affection for fried dough has never waned. It was recently rekindled by my friend Jason, who told me about an easy way to make doughnuts. The act of home frying was real work, which made me feel entitled to consume some of my products without guilt.

The origin of the doughnut is disputed. Most evidence points to its introduction by Dutch settlers, whose deep-fried dough carried the moniker olykoeks (oily cakes), though some contend that Native American frybread is the true precursor. Regardless, appreciation of fried dough is common to many societies in China, India, Europe and the Middle East.


Makes 8 doughnuts

Ingredients

3-4 cups vegetable oil, for frying
Pillsbury Grands or other pre-made canned biscuits (do not use buttermilk biscuits)
3 ounces bittersweet chocolate
3 tablespoons butter
2 cups confectioner’s sugar
boiling water
shredded coconut, chopped nuts or sprinkles (optional)

Directions
1. Heat oil over medium heat in a home fryer or deep pot (do not use a not-stick pan as the coating may degrade). The oil should be about 3 inches deep.
2. Open the biscuits and lay flat on waxed paper.
3. With a small bottle cap, punch out a hole in each biscuit. Use your fingers to increase the hole if necessary.
4. When oil is at 375F, fry doughnuts until golden brown (about two minutes on each side). If you don’t know how hot the oil is, test it with one of the doughnut holes. The dough should fry to golden brown. If the oil is too hot, it will become dark brown. The canned biscuit dough is different from regular doughnut dough so it will fry to a deeper color. You may have to sacrifice a full doughnut to make sure you have your oil at the right temperature.
5. Drain doughnuts on paper towels. Pat to remove excess oil.
6. In a wide and shallow bowl or plate, melt chocolate and butter in the microwave. Add confectioner’s sugar to make a glaze. Carefully add boiling water until the correct consistency is reached.
7. Using tongs or your fingers, dip the doughnuts in the glaze. Sprinkle with coconut, nuts or sprinkles if desired. Allow glaze to harden and serve warm or at room temperature. Doughnuts taste best on the day they are made. Note that the unfried biscuit dough cannot be saved once the can is open, so bake into biscuits if you can’t consume 8 doughnuts.

Friday, December 14, 2007

Hanukkah Shortbread Cookies


This was my second year celebrating Hanukkah with my boyfriend’s family. The occasion involved abundant food including Laura’s lovely latkes, a plethora of driedels and menorahs, and a mountain of blue and gold wrapping paper.

Other highlights from this year: a flashing yoyo that plays the ‘Dreidel, Dreidel, Dreidel’ song, uncle Mark’s reindeer antlers hung with stars of David, and singing the Adam Sandler Hanukkah song with the whole family. As a fitting end to our Hanukkah weekend, we saw a car on the highway with a huge menorah attached to the roof. As you can see, Hanukkah is big in New York!

My modest contribution to this year’s festivities was shortbread cookies that I made in Oxford and brought over in my hand luggage. Unfortunately, a number of them broke (the stars points snapped off) but I was able to bury them in the cookie platter and I don’t think anyone noticed.

Shortbread is one of my favorite treats. As a child, I ate a lot of Walkers Shortbread during the Christmas holidays (and all year long). My cookies are not quite as decadent, but are especially delicious with frosting. Thanks to Sarah for sharing the blue colored sugar that I used on some of the cookies.


Makes 60 cookies

Ingredients
Cookies
2 cups unsalted butter, softened
1 cup granulated or caster sugar
2 teaspoons vanilla extract (optional)
4 1/2 cups all-purpose flour
pinch salt

Icing
1 cup confectioner’s sugar
2 drops blue food color
2 teaspoons of water
silver dragées, for garnish (optional)
colored sugar (optional)


Directions
1. Add salt to flour. Set aside.
2. Using a mixer, cream the butter and sugar until light and fluffy. Add vanilla and mix well.
3. Add half the flour and incorporate using the mixer. With a wooden spoon, incorporate the remaining flour until the dough forms a soft ball.
4. Divide the dough into four parts and wrap each separately in saran wrap. Refrigerate for 30 minutes or until the dough is cool and firm.
5. Preheat the oven to 350 F.
6. Remove one portion of dough, and on a floured surface roll to 1/4 to 1/2 inch thickness. With a cookie cutter make star shapes and place directly onto an ungreased baking sheet. If using colored sugar, sprinkle it on the cookies before baking.
7. Bake for 8-12 minutes, until the edges just begin to brown. Cool to room temperature.
8. To make frosting, mix confectioner’s sugar and 1 teaspoon of water. Slowly add more water until you reach the consistency of honey. Add floor color, one drop at a time.
9. Use a knife to spread frosting on cookies. If using dragées, place them immediately and allow the frosting to set.
10. Cookies can be kept in an airtight container for up to one week.

Thursday, October 25, 2007

Spicy Hummus


Today I present one of the staples of my kitchen – hummus. I must admit that I usually purchase this from the grocery store, although it is very easy to make. Hummus is common to the cuisines of the Middle East, though I could not find much information about its origins.

This humble spread is incredibly versatile and I eat it regularly as sandwich filling or on toast, even better with fresh or roasted vegetables. It is also great with crackers, fresh or deep-fried pita, falafel and crudités. My friends John and Andrea recently served hummus paired with cubes of feta cheese – a lovely and unusual combination that I highly recommend. And today for lunch I had a hummus and harissa sandwich - a combination suggested by my friend Sarah.

Most store-bought versions have much more oil (and calories) and less zing than this natural version. The only downside is that, without preservatives, this home-made hummus will not last beyond one week in the refrigerator. I wonder if it can be frozen?
Makes about 2 cups

Ingredients
16 ounces chickpeas, drained and rinsed (pictured above)
3 tablespoons tahini
1 lemon, juiced
3 tablespoons olive oil
1 to 2 teaspoons garlic, minced
1/2 teaspoon cayenne or to taste
1/2 teaspoon salt
1 teaspoon cumin
about 1/2 cup water
1 teaspoon paprika, for garnish
sprig of parsley, for garnish

Directions
1. Place the first seven ingredients in a food processor or blender and process until well mixed. Add water as necessary, and add more than 1/2 cup if you prefer it to be less thick.
2. Garnish with paprika and parsley and serve at room temperature.

Wednesday, June 13, 2007

Almond and Pistachio Baklava


When my parents first moved to Canada, my father worked for a man named Stavros, whose Greek mother entrusted us with her family baklava recipe. I grew up eating the pastry only on special occasions. My parents would throw huge dinner parties, which they would prepare for many days in advance. Baklava was a favorite, advance-prep dessert that they made in a deep baking sheet. Predictably, the guests would only eat half of the baklava, which left much syrup-dripping pastry for my indulgence.

Although many of us associate baklava with Greek cuisine, research shows it is most likely of Turkish or Assyrian origin, though both theories have been contested. The main ingredient is phyllo (named for the Greek word for “leaf”), a delicate dough that is thought to have originated in the Topkapi Palace of the Ottoman Empire. Whatever the origin, baklava is widely eaten in the Middle East and Central Asia.

This recipe draws from Stavros’ mother’s recipe, as well as the culinary skills of my friend Christina.
Makes 35 squares

Ingredients
1 3/4 cups granulated sugar
1/2 cup honey
2 cinnamon sticks (optional)
peel of one orange (optional)
1 1/4 cups water
2 tablespoons rose water
3 cups almonds and pistachios, chopped
1 teaspoon cinnamon
1/2 teaspoon allspice
1/2 teaspoon cardamom
1 pound phyllo dough, thawed overnight in the refrigerator
1 cup unsalted butter (2 sticks)
whole cloves, for decoration

yogurt, for serving (optional)

Directions
1. Over medium heat dissolve 1 1/2 cups sugar and honey in water. Add cinnamon sticks and orange peel and bring to a boil. Remove from heat, add rose water and cool to room temperature.
2. Mix nuts, 1/4 cup sugar, cinnamon, allspice and cardamom. Set aside.
3. Melt the butter.
4. Remove phyllo dough from the fridge and place on cool surface. Cover with a wet cloth to keep moist. Work quickly as the phyllo dough dries out quickly.
5. Brush a 9 x 14 inch pan with butter. Make sure the butter reaches the corners of the pan.
6. Place one sheet of phyllo dough (fold in half if you have 14 x 18 pieces of phyllo) in the pan. Brush with butter. Repeat with five more sheets, brushing with butter after each sheet.
7. Sprinkle with half the nut mixture. Top with six more phyllo sheets, brushing with butter after each sheet.
8. Sprinkle with the remaining nut mixture. Top with the remaining phyllo sheets, brushing each with butter.
9. Chill the pan until the butter has hardened. This will make it easier to cut. Preheat oven to 325 F.
10. Cut baklava into diamonds, triangles or squares. Press one clove into the center of each piece.
11. Bake for 40-50 minutes until golden brown. While baking, strain the syrup to remove cinnamon sticks and orange peel.
12. Remove from the oven and pour syrup over hot baklava. Let stand for 4 hours or overnight. Serve with yogurt to balance the sweetness of the pastry.