Showing posts with label Breads/Loaves. Show all posts

Friday, December 27, 2013

Cinnamon Buns


I loved cinnamon buns as a child—they were a rare treat from the donut shop or grocery store.  In high school, while working in the local shopping mall, during the break of my shift I used to reward myself with Cinnabon’s 900-calorie cinnamon bun.  These were extra-large, warm, and super cinnamon-y rolls like no others I had experienced.

I haven’t eaten at a Cinnabon in decades, but my passion for these treats never abated.  Last year my friend Liz shared an easy cinnamon bun recipe that requires no yeast.  It is healthier than traditional recipes that call for much more sugar and butter.  This version is an adaptation of Liz’s recipe.

Makes 9 buns

Ingredients
Filling
1/3 cup granulated sugar
1/3 cup dark brown sugar, packed
2 1/2 teaspoons cinnamon
1/8 teaspoon nutmeg
1/8 teaspoon cloves
1/8 teaspoon salt

Dough
3 tablespoons unsalted butter
1 1/4 cups buttermilk (reduced fat is acceptable)
2 1/2 cups unbleached flour
2 tablespoons granulated sugar
1 1/4 teaspoons baking powder
1/2 teaspoon salt
1/2 teaspoon baking soda

Glaze
2 tablespoons cream cheese (reduced fat is acceptable), room temperature
2 tablespoons buttermilk
3/4 cup powdered sugar

Directions
1.     Preheat oven to 425 F.  Spray an 8 or 9-inch square or circle pan (metal, glass, or ceramic) with vegetable cooking spray.  Set aside.
2.     In a small bowl, mix the filling ingredients together.  Set aside.
3.     For the dough, in another small bowl melt 2 tablespoons of butter and cool.  Then add buttermilk and set aside.  In a large bowl, mix flour, sugar, baking powder, salt and baking soda.  Add the wet ingredients to the flour mixture and stir with a wooden spoon until the liquid has been absorbed.  Gently knead to incorporate remaining flour.
4.     On a well-floured surface (such as a baking sheet, which will contain the mess), continue to knead the dough for 1 minute.  Pat the dough into a 12 x 9 inch rectangle.
5.     Melt the remaining tablespoon of butter and use your fingers to spread it on the dough.  Spoon the filling evenly across the dough leaving a 1/2-inch border.  Use your fingers to firmly press the filling into the dough.
6.     Roll the dough along its long edge, pressing firmly to form a tight log.  Pinch the edge to seal.
7.     Use dental floss to cut the log into thirds; then further cut each piece into thirds.  To do this, slide the floss under the log and cross the ends to cut through the dough.
8.     Place each roll sideways into the pan (see photo below).  Pinch the ends if needed and gently press to flatten and adhere the filling to the dough.


9.     Cover with foil and bake for 10 minutes.  Remove foil and bake for a further 10-15 minutes until the buns are lightly browned.
10.     While the buns are baking, in a medium sized bowl make the glaze by mixing the cream cheese and buttermilk.  Slowly add the powdered sugar until the glaze is smooth.  Set aside.
11.     Once the buns have baked, cool for five minutes and then spoon on the glaze.  Serve immediately from the pan or transfer to a platter.


Tuesday, May 21, 2013

Quick Sopaipillas


Sopaipillas are a traditional dessert I discovered while living in the American Southwest.  I first tried them at the El Rialto Restaurant in Las Vegas, New Mexico, a few miles from where I lived.

These treats are sometimes referred to as little pillows, since they are puffed and hollow in the center.  The word means ‘little bread soaked in oil.’  This is a quick version made from tortillas; the original is made from fresh dough.

Fried dough is a treat in many culturesincluding donuts in America, puri in India, mandazi in East Africa, and churros in Mexico.  Fried dough is sometimes dusted, dipped, or filled; other times it is served in its unadorned golden splendor.

For me, the hardest thing about frying is making sure the oil is at the correct temperature.  If you don’t have a thermometer, test the oil by dropping in a small amount of dough.  It should produce vigorous bubbles and reach a golden brown color in 60 seconds.  If it browns too quickly or slowly, adjust the temperature accordingly.

Ingredients
4 8-inch wheat tortillas
vegetable oil (preferably canola or corn), for frying
powdered sugar or cocoa (optional)
honey, for serving (optional)

Directions
1.     Heat 1/2 to 1-inch oil in a deep and small pot on medium-high heat.  Let the oil heat for 5-10 minutes before testing it.  The oil should be 350F.
2.     Cut tortillas into wedges or strips.
3.     Fry tortillas pieces in batches for 1 to 2 minutes on each side, flipping once.  Drain on a plate lined with paper towels. 
4.     Dust with powered sugar or cocoa.
5.     Drizzle or dip into honey to serve.

Thursday, March 21, 2013

Irish Soda Bread


Like many holidays with a religious origin, St. Patrick’s Day has become a secular observance in much of the United States.  The day celebrates one of the most recognized patron saints of Ireland who brought Christianity to the island in the 5th century.  He is also credited with banishing snakes from the country, though scientific evidence suggests there were no snakes in post-glacial Ireland.

While it has not taken on the commercialism associated with Christmas, Valentine’s Day, and Halloween, this holiday is often associated with bacchanalian revelry.  On this night, Irish pubs and other watering holes teem with some of the 36 million Americans that claim Irish ancestry (and many others who make no such claims!) decked out in green shamrocks, clothing, accessories, and face paint.  While I tend to avoid the crowds on this night, I decided to observe the occasion by baking soda bread—a treat commonly made by North Americans on St. Patrick’s Day.

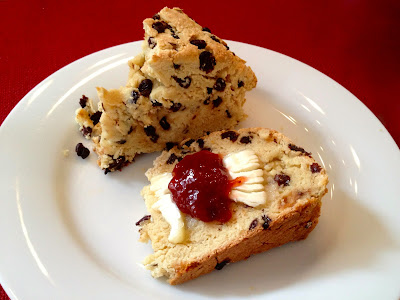
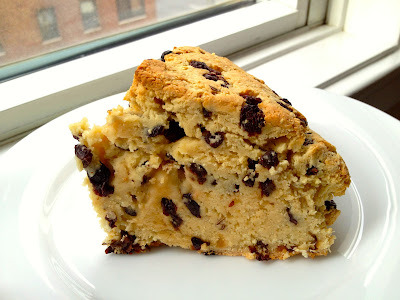
Traditionalists complain that modern versions hardly resemble the original recipe, which was limited to flour, baking soda, salt, and buttermilk.  My formula includes a few enhancements—caraway seeds, currants, egg, and a touch of sugar—but is restrained in comparison to some cake-like creations.  An online search revealed soda bread recipes with chocolate, butter, orange zest, pastry flour, and loads of sugar; these decadent items sound more like components of French pastries than the baked goods of the formerly poverty-stricken Irish.  One disparaging online testimonial scoffed at the notion of orange zest in soda bread, reminding the audience that oranges were a rare treat only given to children at Christmas.

Thankfully, we live in less austere times and so we can enjoy soda bread (and oranges) more than once a year.


Serves 8-12

Ingredients
4 cups unbleached all-purpose
4 tablespoons sugar
1 teaspoon baking soda
1 teaspoon salt
1 tablespoon caraway seeds
1 cup dried currants or raisins
2 cups buttermilk
1 extra-large egg, lightly beaten

Directions

1. Preheat the oven to 375 degrees F.
2. In a large bowl, combine the flour, sugar, baking soda, salt, caraway seeds, and currants/raisins.
3. In a small bowl, beat the buttermilk and egg together.
4. Using a wooden spoon, add the wet ingredients to the dry ones.  Knead the dough to incorporate all the ingredients and add additional buttermilk (in one tablespoon increments) if needed.  Do not knead the dough too much.  The dough should be rough and craggy; it will not be smooth like dough that contains butter and more eggs.
5. Shape loaf into a ball and flatten slightly.  Place it on a baking sheet lined with parchment paper.
6. Score the loaf with an X that comes almost to the edge of the loaf.  The cut should be about 1/4 inch deep.
7. Bake for 50 to 60 minutes, or until a cake tester comes out clean. When it is done, tapping the loaf will produce a hollow sound.
8. Cool on a baking rack for 5-10 minutes.  Serve warm or toasted with butter, jam, or honey.
9. To freeze, cover with saran wrap and place in an airtight container for up to 2 months.